
Comparison
How to Photograph the 2026 Perseid Meteor Shower
Learn how to photograph the 2026 Perseid meteor shower with entry-level camera gear and a tripod. This step-by-step guide covers camera settings, planning tools, and post-processing techniques to help students capture memorable meteor photos under the ideal new-moon conditions.
Verdict panel
- Compared
- not specified
- Target exam
- not specified
- Best for
- not specified
- Pricing last reviewed
- pricing currency unconfirmed
The 2026 Perseids are the rare year when a beginner’s biggest problem is not the Moon. The shower peaks around Aug. 12–13 with the Moon at 0% illumination, so a student with a borrowed tripod, an entry-level DSLR or mirrorless camera, and a kit lens has a real reason to try seriously instead of assuming meteor photography belongs to people with four-figure lenses.[1]
Under ideal dark-sky conditions, the Perseids can produce 100+ meteors per hour at peak, but that number is not a promise for one backyard, one camera, or one cloudy campus parking lot.[2] What matters for a first attempt is narrower and more useful: go somewhere dark, cover both peak mornings if possible, set the camera manually, and let it shoot continuously while you stop touching it.
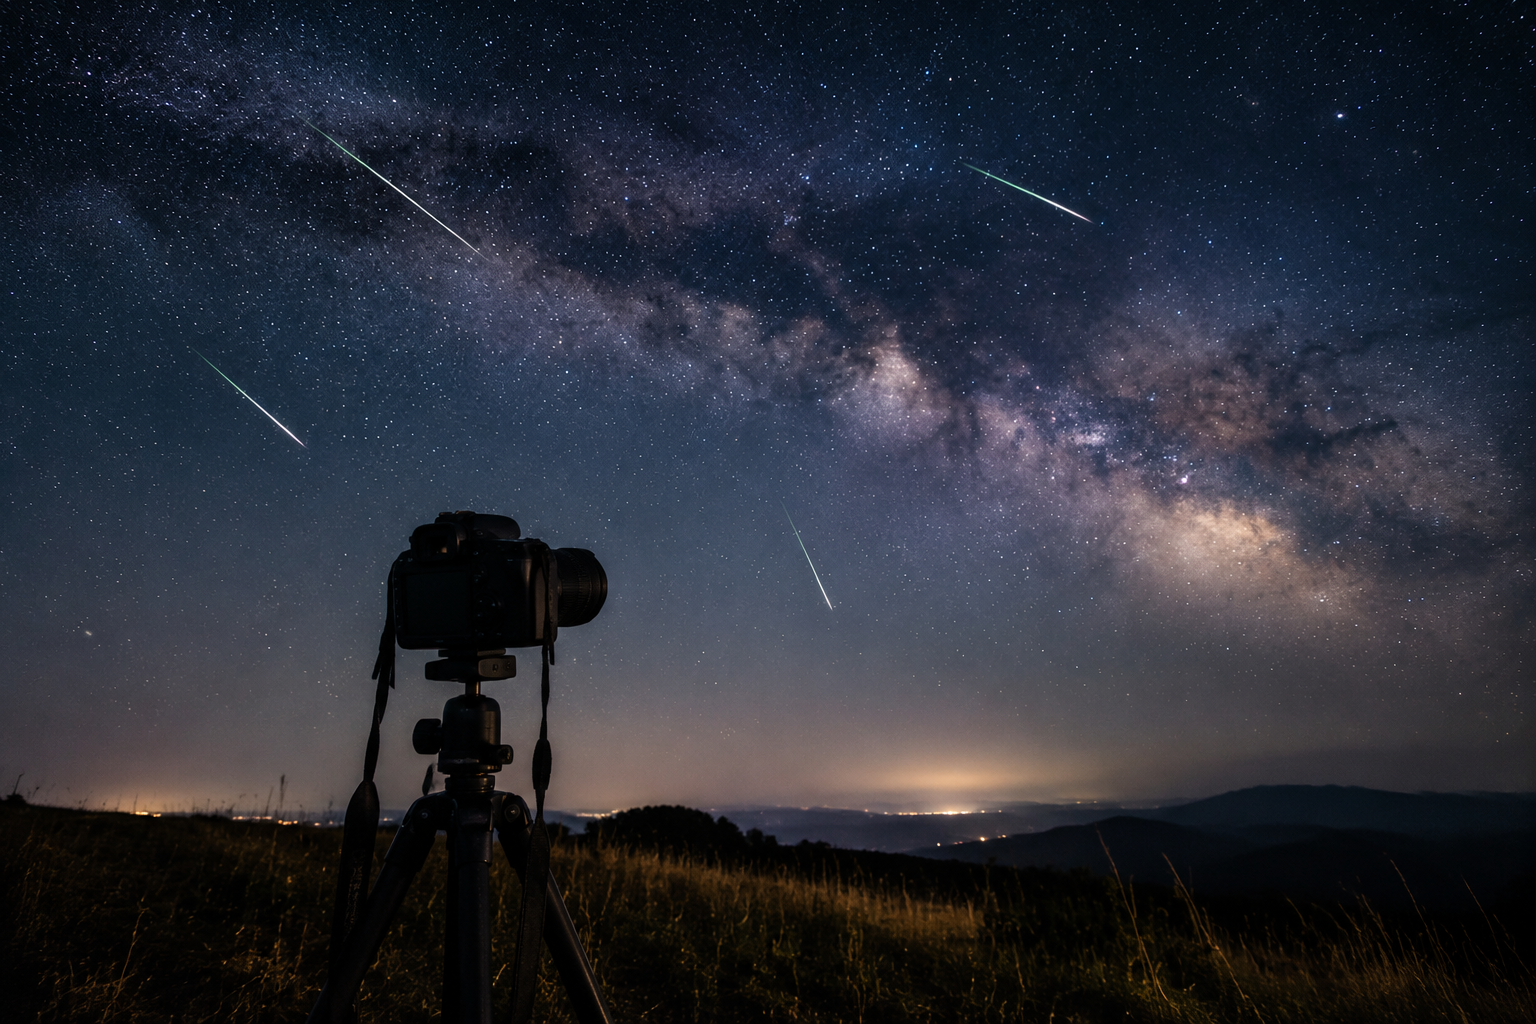
The Setup That Is Actually Enough
For a first Perseid shoot, the essential kit is smaller than most astrophotography shopping lists make it sound:
- A DSLR or mirrorless camera with manual mode, such as a Canon Rebel, Nikon D3500, Sony a6000, or similar beginner body.
- A wide lens. An 18–55mm kit lens works at its widest end, especially for bright meteors. A 14mm or similar f/2.8 lens improves the odds because it sees more sky and gathers more light.
- A tripod that can stay still for hours. It does not have to be fancy; it does have to resist wind, bumps, and sagging.
- A remote shutter release, intervalometer, or built-in interval shooting mode if your camera has one. If not, use continuous shooting with a locked shutter release if your setup allows it.
- At least one charged battery, more if you can borrow them. Long exposures, Live View focusing, and cold air drain batteries faster than a normal afternoon shoot.
- Warm clothes, a headlamp with red mode or a dim light, snacks, and enough patience to not check the camera every two minutes.
A fast lens is helpful, not mandatory. PhotoPills makes the useful budget point that a roughly $300 Rokinon 14mm f/2.8 can outperform a much more expensive f/4 zoom for meteor work because aperture and sky coverage matter so much.[3] That is the kind of upgrade worth getting excited about if you already know you like this, but it is not the admission ticket.
Plan for Two Mornings, Not One Perfect Minute
The safest student plan is to shoot before dawn on both Aug. 12 and Aug. 13 if your schedule, transportation, and weather allow it. PhotoPills lists the 2026 peak at Aug. 13, 01:37 UTC, while EarthSky gives Aug. 13, 14:53 UTC, and meteor shower forecasts are not precise enough to justify treating either timestamp like a class bell.[3][4]
EarthSky places the 2026 Perseid activity window from July 17 to Aug. 24, with the best viewing around Aug. 12–13 and generally after midnight.[4] For photography, that means the useful field session is not sunset. Arrive before midnight, get focused and framed while you can still think clearly, then let the camera run through the darker, meteor-richer hours toward dawn.
| Task | Free or low-cost tool | What to check |
|---|---|---|
| Find darker skies | Light Pollution Map | Move away from city glow if transportation allows it |
| Check clouds and transparency | Clear Outside or a local forecast | Avoid betting the whole night on a cloudy site |
| Locate the radiant area | Stellarium Web | Find Perseus in the northeast, then aim away from it |
| Confirm shower timing | AMS Meteor Shower Calendar, EarthSky, PhotoPills | Treat peak estimates as a window, not a single minute |
The radiant is in Perseus, near the Double Cluster in the northeast sky, but pointing directly at the radiant is usually not the best composition.[4] Meteors that begin near the radiant look shorter. For longer streaks, aim your camera roughly 30–60° away from the radiant, then include a clean foreground if you have one: a tree line, a campus observatory dome, a quiet road, or just open sky without streetlights.[7]
Do not skip the boring logistics. Check whether the park closes at night, whether campus security will ask why you are standing by a tripod at 3 a.m., whether sprinklers run in the field, and whether your ride is willing to stay until dawn. A good meteor plan can fail for reasons that have nothing to do with ISO.
Use These Camera Settings as Your Starting Point
Start here, then adjust after a few test frames:
| Setting | Starting value | Why it matters |
|---|---|---|
| Mode | Manual | The camera cannot guess meteor exposure in the dark |
| File type | RAW if available | RAW gives more room for exposure and noise adjustment later |
| Focal length | Widest available, such as 18mm on an 18–55mm kit lens | More sky in the frame means more chances |
| Aperture | Lowest f-number your lens allows | Meteors are brief, so gather as much light as possible |
| Shutter speed | 20–30 seconds, checked with the 500-rule | Long enough to collect stars, short enough to limit star trailing |
| ISO | 1600–6400 | Sensitive enough for meteors, without treating noise as unlimited |
| Focus | Manual focus on a bright star using Live View | Autofocus will usually fail or hunt in the dark |
| Long Exposure Noise Reduction | Off | LENR can make the camera unavailable after each exposure |
| Drive | Continuous or interval shooting | The meteor you want will not wait for you to press the button |
| White balance | Around 4000K, or fixed daylight/tungsten if your camera is simpler | A fixed value keeps the sequence consistent |
Nikon ambassador Diana Robinson gives f/2.8, 20 seconds, ISO 4000, and 4000K white balance as a go-to meteor starting exposure.[5] If your kit lens only opens to f/3.5 at 18mm, do not panic. Use f/3.5, try ISO 3200 or 6400, and accept that the camera will favor brighter meteors.
The 500-Rule Without Making It a Math Exam
PhotoPills describes the 500-rule as 500 divided by focal length to estimate the longest exposure before star trails become obvious.[3] On a full-frame camera at 20mm, that gives about 25 seconds. On many APS-C beginner cameras, you need to account for the crop factor, so an 18mm kit lens behaves more like a 27mm lens; in practice, test 20 seconds first, then try 25 or 30 seconds if the stars still look acceptable.
For meteor photography, slightly imperfect stars are not the end of the world. A sharp meteor in a 25-second frame is more interesting than a technically perfect empty sky. Still, if the stars turn into obvious dashes, shorten the shutter speed before raising ISO again.
Focus Before the Best Meteors Start
Manual focus is the step that ruins the most first attempts because the back of the camera can make a blurry star field look acceptable at a glance. Do this slowly before you start the long sequence:
- Set the lens to manual focus.
- Turn on Live View.
- Point at a bright star or planet.
- Magnify the Live View display as much as your camera allows.
- Turn the focus ring until the star becomes the smallest, sharpest point.
- Tape the focus ring gently if the lens is easy to bump.
- Take a test shot and zoom in on the playback to check star sharpness.
Do not trust the infinity mark on a cheap zoom lens. On many lenses, the actual sharp point is slightly before or after the printed mark, and temperature changes can shift it. Once focus is good, stop fiddling with it unless you bump the lens.
Let the Camera Shoot While You Watch the Sky
A Perseid can be gone before your thumb reaches the shutter. The American Meteor Society notes that most Perseid meteoroids are about the size of sand grains, travel around 37 miles per second, and usually appear in only one frame, unlike airplanes or satellites that cross many frames.[6] That one-frame behavior is the whole argument for continuous shooting.
If your camera has an intervalometer, set it to repeat 20–30 second exposures with the shortest gap it allows. If it only has continuous drive, use a remote release that can lock the shutter button down. If you have neither, you can still shoot manually, but every gap is a chance for the best meteor of the night to happen while the camera is idle.
Turn Long Exposure Noise Reduction off. PhotoPills points out that LENR can effectively double the time between usable frames because the camera takes a dark frame after each exposure.[3] That tradeoff may be fine for a single landscape photo; during a meteor shower, it means missed sky.
Check the first few frames for focus, exposure, and composition. After that, leave the camera alone for long stretches. Use the dimmest screen brightness you can, avoid blasting the group with a white phone screen, and resist deleting frames in the field. A nearly black thumbnail may still contain a faint streak that becomes visible on a larger monitor.
A Practical Aug. 12–13 Field Plan
Here is the version that fits on a note in your camera bag:
- Afternoon: charge batteries, clear memory cards, pack layers, check weather, and choose the darkest reachable site.
- Before leaving: use Stellarium Web to see where Perseus rises from your location, then choose a framing direction 30–60° away from the radiant.
- Around arrival: set up the tripod away from headlights, streetlights, and people walking through the frame.
- Before midnight: focus carefully on a bright star, take test frames, and confirm the stars are sharp.
- Midnight to dawn: shoot continuous 20–30 second frames at the widest aperture and ISO 1600–6400.
- After each long run: check that dew, focus drift, or a dying battery has not ended the session.
- Next morning: back up the card before sorting, because the good frame may not be obvious on the camera screen.
If you can only shoot one morning, choose the clearer forecast over the theoretically better peak estimate. A perfectly timed cloud deck helps no one.
What to Expect From a Kit Lens
An 18–55mm kit lens is not useless. At 18mm and f/3.5, it can catch bright Perseids, especially under the 2026 new Moon. The limitation is that it gathers less light and often sees less sky than a fast wide-angle lens, so faint meteors that a 14mm f/2.8 might record may never show up clearly.
That limitation should change expectations, not cancel the attempt. A kit lens night might produce one or two frames worth editing rather than a gallery full of fireballs. That is still a successful first meteor shoot, especially if the stars are focused, the foreground is steady, and the captured streak is real.
Sorting and Editing the Frames
Start by copying the full card to a computer and reviewing the frames at a large size. Look for short, clean streaks that appear in one frame. Airplanes usually show dotted or multi-frame trails; satellites often move steadily across several frames. Meteors are messier, faster, and less polite.
For a single good meteor frame, basic edits are enough: raise exposure carefully, add contrast, adjust white balance, reduce noise, and avoid pushing clarity or sharpening until the sky looks crunchy. If the foreground is too dark, lift shadows gently. The goal is to show what the camera caught, not to turn the sky into a plastic poster.
If you want a star-trail image from the whole sequence, free software such as StarStaX can combine many frames into circular trails while preserving brighter streaks. Keep a separate edit of the best single meteor frame, though. A stacked trail image and a clean meteor capture are different results, and both can be worth keeping.
A Small 2026 Calendar Note
Aug. 12, 2026 is also the date of a total solar eclipse, with a path through Greenland, Iceland, and Spain.[8] It is a neat astronomy coincidence, but it does not change the Perseid photography plan for most North American students. The useful part for this guide is still the new-Moon darkness at the meteor peak.
Field Checklist
- Shoot before dawn on Aug. 12 and Aug. 13 if possible.
- Choose the darkest reachable site with a clear forecast.
- Use manual mode, RAW, widest focal length, and widest aperture.
- Start around 20–30 seconds, ISO 1600–6400, and fixed white balance.
- Focus manually on a bright star through magnified Live View.
- Aim 30–60° away from the Perseid radiant, not directly at it.
- Turn Long Exposure Noise Reduction off.
- Shoot continuously for hours, not one frame at a time.
- Expect the kit lens to catch mainly brighter meteors.
- Bring warm clothes, batteries, memory cards, and a way home.
Clouds may win. The brightest meteor may happen outside your frame. A kit lens will miss faint streaks that faster glass would catch. Still, the 2026 new-Moon peak gives beginners the one advantage no expensive lens can fake: a dark sky at the right time. With two planned mornings, manual settings, and free tools, that is enough to come home with a frame worth keeping.
References
- How to Photograph a Meteor Shower, NASA, science.nasa.gov
- Perseid meteor shower 2026 guide, Space.com
- Meteor Showers 2026: The Definitive Photography Guide, PhotoPills
- Perseid meteor shower 2026, EarthSky
- Photographing Meteors, Fireballs and Meteor Showers, Nikon
- How to Photograph Meteors with a DSLR, American Meteor Society
- How to Photograph Your First Meteor Shower, PhotographingSpace.com
- The Perseid Meteor Shower Begins Today: When To Watch, Forbes, July 17, 2026
Back to the exam this applies to
Target exam not specified — see all exam hubs.
Comments
Join the discussion with an anonymous comment.